Monday, July 21, 2014

Mommy Mondays: Baby Hilosky #3 Update

It has been a long time since I did a Mommy Monday post, so I thought that today would be the perfect Monday to do that and give you an update on Baby #3 at the same time!

Last month, we announced to the world that we would be becoming Hilosky Family Party of Five!  We have known about Baby #3 since Easter, and our immediate families found out on Mother's Day! But we waited until June 13th (which was 12 weeks) to tell everyone else!

Currently, I am 17 weeks and feeling great!  I have had two doctors appointments since my 12th week baby post, and both Mama and Baby are doing great!  I can already feel baby move a ton! Morning sickness is a thing of the past.  I am definitely tired...but not as bad as it was in the first trimester! This pregnancy I have been really good about taking week by week pictures (something I did not do with the girls).  I also made myself a cute little chalkboard thanks to some help from my good friend Pinterest.

Week 13 Baby Bump! 


Week 13 Chalkboard!


Week 14 Baby Bump!  So happy to be saying "hello" to the second trimester and saying "goodbye" to morning sickness!!!


Week 14 Chalkboard!


Week 15 Baby Bump and Happy 4th of July! I didn't have any red, white, and blue maternity clothes so I simply had to go with red and white.


Week 15 Chalkboard! 


Week 16 Baby Bump!  4 months already!  I had already been feeling little flutters for about 3 weeks, but this was the week I really started to feel a lot of movement!


Week 16 chalkboard.  


This is my current Baby Bump!  Week 17!  The heartburn is kicking in big time!  That is not surprise since I lived on Tums with both Lacie and Blakely.  


My current chalkboard!  Baby Hilosky can already hear what is going on out here! 

Stay tuned for Baby Hilosky #3 updates!  Less than three weeks until we find out if this baby will add even more PINK to our lives or if this baby will bring a little spot of BLUE! 


A Little Chalkboard Inspiration:

Saturday, July 19, 2014

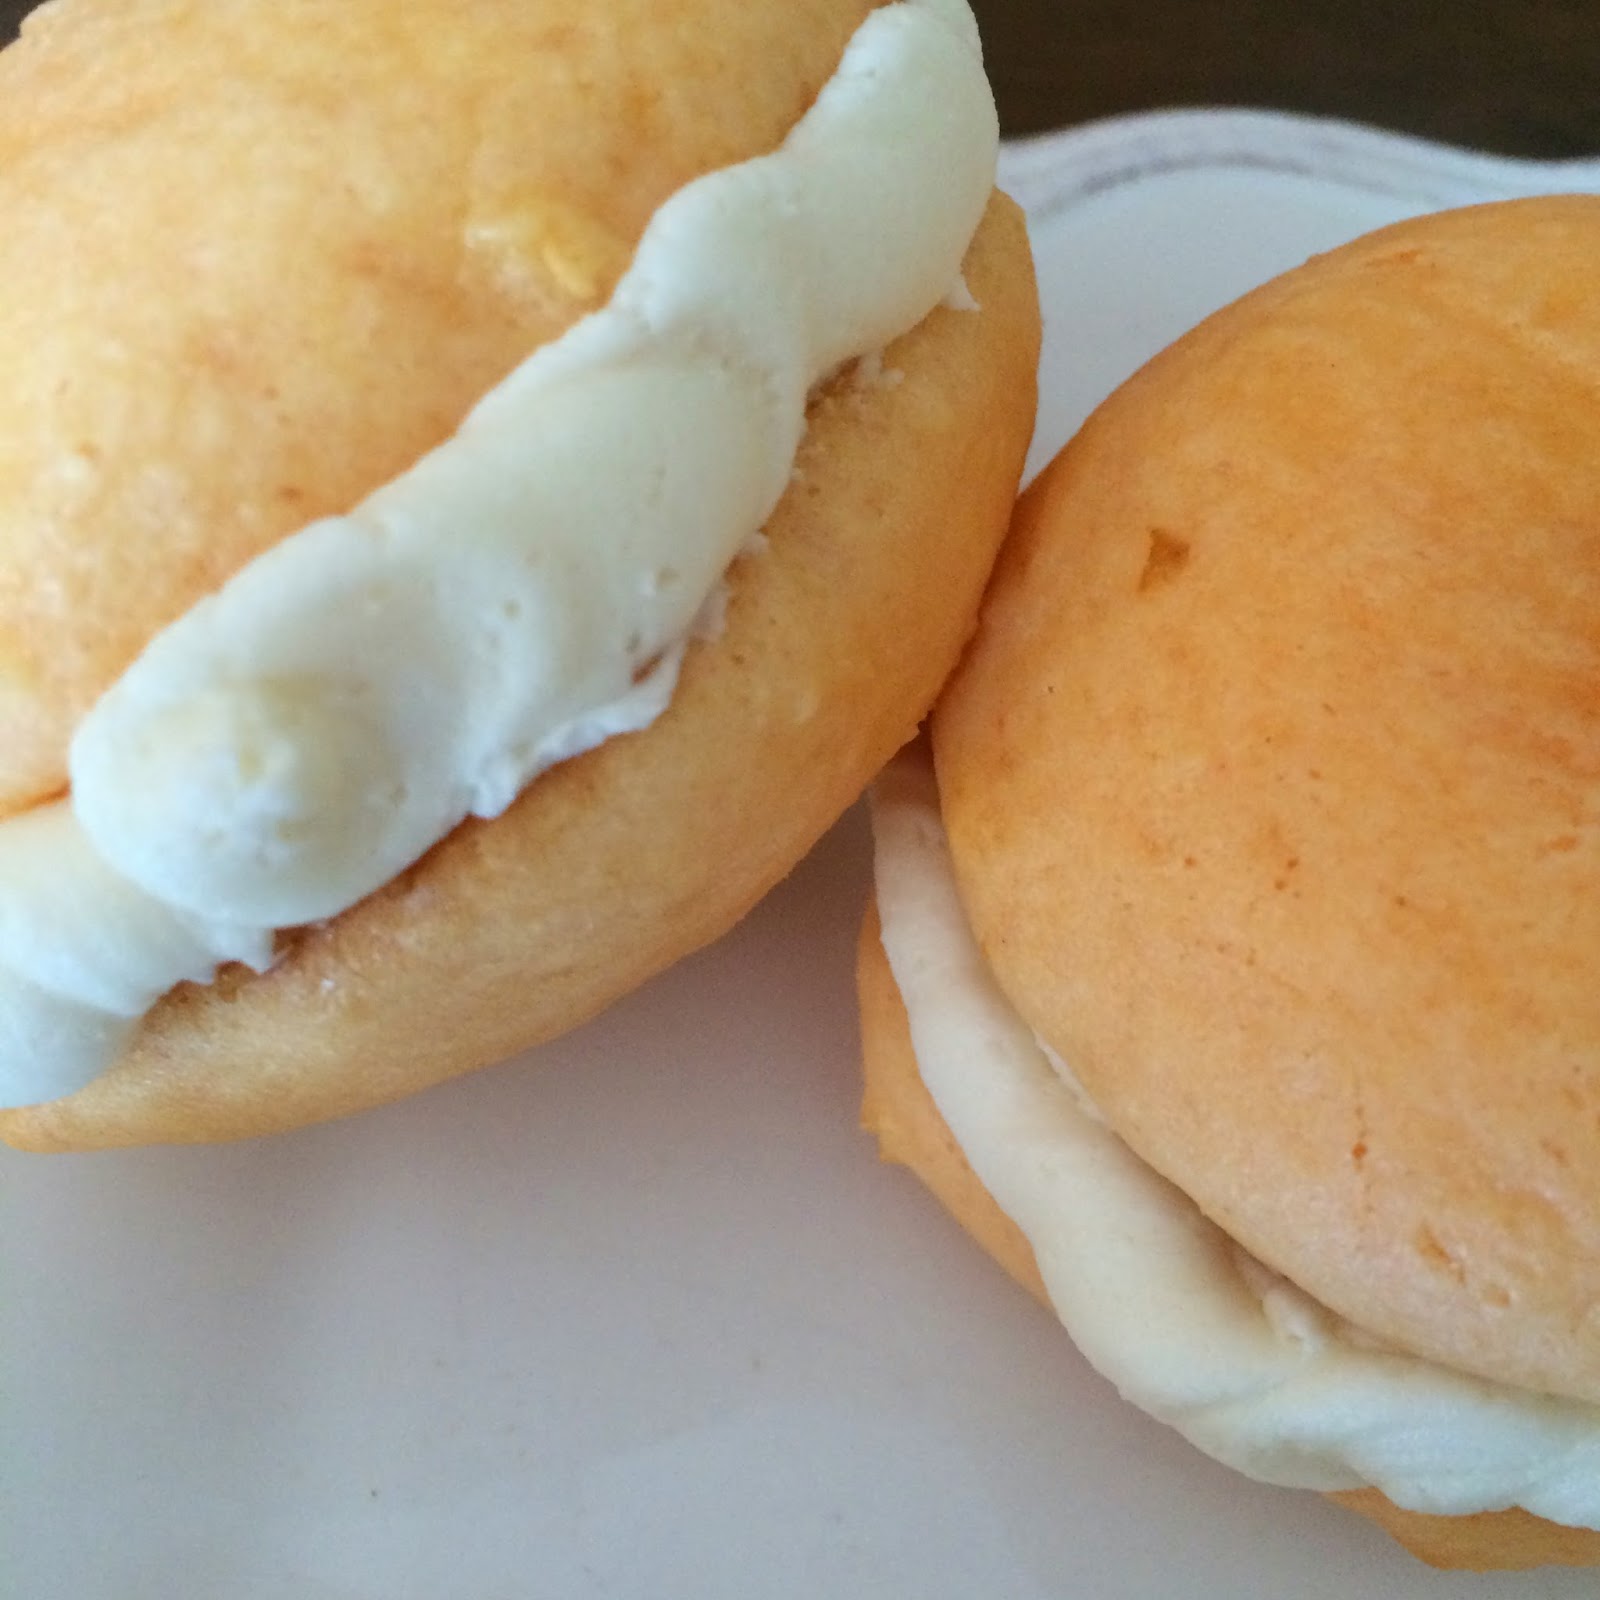
Orange Creamsicle Whoopie Pies


Around Easter time I made Orange Creamsicle Cookies, and they were a big hit with my family!  Yesterday for my Dad's birthday, I wanted to use the same flavor idea but make something a bit different...

Whoopie Pies!

They came out DELICIOUS!  And they honestly taste just like a creamsicle!  Plus, they couldn't be easier to make...especially since they are CAKE MIX RECIPE #39!!!!!

This cake mix is perfect for this recipe! 

Your Shopping List for the Orange Creamsicle Whoopie Pies:
  • 1 box orange cake mix
  • 1/2 cup veggie oil
  • 1/3 cup water
  • 3 eggs
  • buttercream or vanilla icing

Now Let's Make the Orange Creamsicle Whoopie Pies:
  1. Preheat your oven to 350 degrees and line your baking sheets with parchment paper.
  2. In the bowl of a stand mixer, fitted with the whisk attachment, combine the cake mix, veggie oil, water, and eggs.
  3. Beat on low speed 30 seconds and scrape down the sides.  Beat on medium speed for 2 minutes.
  4. Drop batter by tablespoon or cookie scoop onto prepared baking sheet, leaving room for the cookies to spread.
  5. Take the back of a spoon or a knife to spread batter into flat circles.
  6. Bake in preheated oven for 8-10 minutes (cookies should be soft but cooked through and just starting to get color on the bottom).
  7. Cool for 2 minutes on cookie sheets before transferring to a wire rack to cool completely 
  8. Once cookies are completely cool, turn half of the pies upside down and frost the bottom.  For this I used my homemade buttercream icing but if you are short on time you could just use store bought icing to make it easier.  
  9. Place the other half of the pies right side up on top of the frosting.
  10. If desired, use a piping bag to pipe extra icing around the center edge.
  11. Store at room temperature for up to 24 hours, after that wrap each whoopie pie individually with saran wrap and store in the fridge.

I found a new love in these little whoopie pies, and I will definitely be mixing up the flavor combos to make a few other cake mix whoopie pies in the near future! 

Happy Summer Baking

Thursday, July 17, 2014

#hiloskyeveryday2014 Week 28 and Week 29

Day 185 - Happy 4th of July!!!  


Day 186 - Can you tell what color Blakely's cupcake was?


Day 187 - I love when I walk in on sweet little moments like this one...Lacie feeding Blakely her afternoon snack saying, "I feed you sister."


Day 188 - When I say these two are best friends, I mean it!  You can see here that Blakely is leaning out of the stroller to hold Lacie's hand.  It's probably time for a side by side stroller.  


Day 189 - I have the very best husband ever!  On his way home from work, he stopped to pick up some ice cream for this pregnant mama! 


Day 190 - we finally took Blakely's highchair tray away and pushed her up to the table so that she can eat with the rest of us! 


Day 191 - Outside fun at Nana and Pop-Pop's house! 


Day 192 - Happy Friday and Happy 16 weeks to me and Baby Hilosky!  


Day 193 - Lacie was very happy after our traditional Saturday morning breakfast of Whole Wheat Chocolate Chip Pancakes


Day 194 - Now that Blakely is sitting at the table, she is in charge of completely feeding herself!  She was mostly doing that anyway with the exception of yogurt, soup, and cereal.  This was her first attempt at self-feeding yogurt!  It went well other than the fact that she scraped the bowl for 20 minutes after she was clearly finished.  


Day 195 - Lacie's first time on the swings at Sesame Place.  You are supposed to be 36 inches and well she's not quite there yet...but Daddy managed to sneak her on.  


Day 196 - A little morning Do-A-Dot art! 


Day 197 - A sweet afternoon treat with Pop-Pop!  PS - my mom has had those ice cream cone shaped bowls and spoons since I was in elementary school.  


Day 198 - Finding a fruit that Blakely will eat is sometimes pretty tricky!  Hooray for apple slices! 

Wednesday, July 16, 2014

Blueberry Banana Bread


If you have noticed a lot of blueberry recipes lately, that is because it's blueberry season in New Jersey!  The season doesn't last long, only a little over a month, so we have been trying to enjoy as many blueberries as we can in as many ways as possible!

And I just knew that one of the things I had to make this season was blueberry banana bread!  


Your Shopping List for the Blueberry Banana Bread:

  • 2 cups plus 1 tablespoon of flour, divided 
  • 1/2 tsp cinnamon
  • 2 tsp baking powder
  • 1 tsp baking soda
  • 1/2 tsp salt
  • 1 stick butter, room temperature
  • 1/2 cup white sugar
  • 1/4 cup light brown sugar
  • 2 eggs 
  • 1 tsp vanilla extract
  • 3 overripe bananas
  • 1 generous cup of blueberries plus extra for sprinkling
This is what I mean when I say "a generous cup of blueberries."  See how they are overflowing out of the measuring cup! 

Now Let's Make the Blueberry Banana Bread:
  1. Preheat your oven to 350 degrees and grease 2 loaf pans (mine are 8 1/2 x 4 1/2)
  2. In the bowl of a stand mixer using the whisk attachment, beat together the butter and both types of sugar until light and fluffy
  3. Add in the eggs one at a time, mixing until thoroughly combined
  4. Add the vanilla extract and the bananas and beat until desired consistency is reached (I like some pieces of banana) 
  5. In a medium bowl, whisk together the 2 cups of flour, cinnamon, baking powder, baking soda, and salt
  6. Add dry ingredients to the wet ingredients and mix on the lowest speed until just combined
  7. Toss the cup of blueberries with the remaining 1 tablespoon of flour (this keeps them from sinking to the bottom of the bread) and then gently fold the blueberries into the batter
  8. Divide batter between two loaf pans and sprinkle a few extra blueberries over the tops
  9. Bake in preheated oven for approximately 40 - 45 minutes until a toothpick inserted into the center comes out mostly clean
  10. Cool bread in loaf pans for 10 minutes
  11. Turn out onto wire racks to cool completely 

Friday, July 11, 2014

Roasted Blueberry Banana Puree


My sweet Blakely Hope is the somewhat more picky eater out of my two girls.  This has been a bit challenge since Lacie will eat pretty much anything I put in front of her (with so much enthusiasm that she could book a commercial).  And what is Blakely picky about eating?  Fruit!  Of all things!  Most kids won't eat their vegetables, but Blakely will eat mushrooms and broccoli by the handful.  The pediatrician once said "Oh some kids just don't like sweets."  Yeah, that's not it...because give that girl and cupcake and it will be gone in three bites!

Here is the list of fruit that Blakely will eat:

  • bananas (every single day)
  • oranges - only the little clementine ones
  • strawberries on a good day
Yup that is it.  But you know what she will eat.  Those fruit pouches.  Any flavor.  So that made me think that I should probably just go back to making the homemade baby food that she loved so much as an infant.  Whatever I can make will undoubtedly have more nutrients then those pouches.  

So I went ahead and used the amazing blueberries that we have been picking at a local organic blueberry farm to make something that was one of Lacie and Blakely's absolute favorite flavor combinations...
Roasted Blueberry Banana Puree


Your Shopping List for the Roasted Blueberry Banana Puree:
  • 3 bananas (you can even use ones that are a little overripe) 
  • 1 pint, about 2 cups, of blueberries 

Now Let's Make the Roasted Blueberry Banana Puree:
  1. Preheat your oven to 350 degrees
  2. On a rimmed baking sheet (like a half sheet pan), arrange the bananas *still in their peels* and blueberries
  3. Bake in preheated oven for 20 minutes, until the skins of the banana have turned black and the blueberries are beginning to burst
  4. Allow to cool on pan for 5 minutes
  5. Scoop up the blueberries with a spoon and carefully peel bananas and place into blender or food processor
  6. For older children like mine, pulse or blend quickly, leaving some texture.  For infants, blend until smooth, adding a few tablespoons of filtered water if needed to reach the right consistency
  7. Store in the fridge for up to 48 hours or freeze portions for use at a later date 


This makes 4 servings of approximately 3/4 cup each.  I put each serving into a bowl (as seen above), cover with saran wrap, and store in the fridge.  When my girls were smaller, it made approximately 8 smaller portions that I froze in a freezer tray meant for baby food!  We eat this cold, right out of the fridge.  Younger babies may want it warmed to room temperature!  

Tuesday, July 8, 2014

Blueberry Coffee Cake


This blueberry cake is a recipe that I have made a number of times over the past five years.  I have adjusted some ingredients here and there until I got it absolutely perfect!  It comes out best using fresh blueberries, but I have used frozen blueberries in a pinch with good results! 


Your Shopping List for the Blueberry Coffee Cake:
  • 2 cups flour
  • 3/4 cup sugar
  • 2 1/2 tsp baking powder
  • 1 tsp salt
  • 1/4 cup butter, melted and cooled
  • 3/4 cup milk 
  • 1 egg, lightly beaten
  • 2 cups blueberries
Your Shopping List for the Crumb Topping:
  • 1 cup sugar
  • 2/3 cups flour
  • 1 tsp cinnamon
  • 1 stick cold butter, cubed
Your Shopping List for the Vanilla Glaze:
  • 3/4 cup powdered sugar
  • 1/2 tsp vanilla extract
  • about 4 tsp milk or water

Now Let's Make the Blueberry Coffee Cake:
  1. Preheat oven to 375 degrees and liberally grease a 9 inch springform pan with cooking spray and set aside
  2. In a large mixing bowl whisk together the flour, sugar, baking powder and salt called for in the Blueberry Coffee Cake shopping list
  3. Add the melted butter, milk, and egg and mix with a wooden spoon until just combined (this batter will be very thick)
  4. Gently fold in the blueberries 
  5. Spread coffee cake mixture evenly into prepared pan
  6. In a small mixing bowl whisk together the sugar, flour, and cinnamon called for in the Crumb Topping shopping list
  7. Cut in cold, cubed butter with a pastry cutter
  8. Sprinkle crumb topping over coffee cake batter
  9. Bake in preheated oven for 45 minutes until the cake is cooked through and the top is golden
  10. Remove from oven and place pan on a wire rack to cool for 10 minutes.  Remove sides of pan and allow cake to continue cooling
  11. Meanwhile in a small mixing bowl, combine the powdered sugar, vanilla extract, and water or milk until a glaze forms that is thin enough to drizzle but thick enough to not fully spread out when poured 
  12. While cake is still warm, drizzle with Vanilla Glaze
  13. Cut and serve coffee cake while warm or allow to finish cooling completely and store in a cake carrier or on a cake plate with lid  


Thursday, July 3, 2014

#hiloskyeveryday2014 Week 27

Happy Week 27!

Day 178 - two little girls who weren't quite ready to wake up from nap!  


Day 179 - Getting ready to go for a morning walk with Nana! 


Day 180 - My 14 week baby bump!  I am so grateful to have officially reached the second trimester and to have said "goodbye" to morning sickness! 


Day 181 - Blakely's first time heading out to the fields to pick blueberries!  She went with us last year too, but of course she stayed in the stroller.


Day 182 - The way these two love each other is so sweet.  It makes my heart melt! 


Day 183 - Lacie enjoying a bowl of roasted blueberry and banana puree for dessert!  I made this with some of the blueberries that we picked at the farm!  I will be putting the recipe up soon.


Day 184 - one of the biggest perks about being in the second trimester is that I can finally stand the smell of nail polish and have started to paint my nails again!  While this may not seem like a big deal to some, I was getting so tired of looking at my naked nails.  Typically I paint my fingers once a week and my toes once every other week! 

LinkWithin

Related Posts Plugin for WordPress, Blogger...