Showing posts with label summer. Show all posts

Friday, May 22, 2015

Friday Favorites: Summer Edition

It's Memorial Day Weekend!!!  Our winter was so long and brutal in New Jersey...I almost feel like we didn't have a spring!  I can't get over how quickly Memorial Day weekend has arrived - and I couldn't be happier!  I love love love the summer!  As a child, it was my very favorite season.  I loved being off from school, I loved going down the shore, and I loved spending my days outside in the sunshine!

Here are some of my favorites this week!

1. Patriotic Cookies


Who doesn't love a good red, white, and blue cookie!  These cookie bars are the perfect thing to take to any weekend BBQ or party that you are attending for Memorial Day or the 4th of July or really any summer event!  The best part is they are a cake mix recipe.  Go find the summer edition of the Funfetti Cake Mix and whip these up in 30 minutes!  Click here for the recipe!


2. Natives
So after reading so many positive reviews online - both on blogs and on Nordstroms website - I decided to get the girls Natives over Crocs.  I still love crocs but thought I would give these a try!  Lacie says they are more comfortable than her crocs and loves putting them on.  I love that my girls can put them on by themselves!!!  I got pink, obviously, but Blakely's are a bit big so I may order a size down in the purple while I wait for her to grow into the pink! 


3. Sunscreen
Sunscreen application may not be my favorite part of summer, but it's a must for everyone - especially my kids who are so pale that you can see right through their skin!  I have blogged about my love of the Honest Company before, and their sunscreen does not disappoint.  It's a physical sunscreen, not a chemical sunscreen, which is so much better for your skin!  It's super thick so it takes some time to rub in but it never comes off!

4. Bathing Suits
I totally dropped the ball on buying the girls bathing suits this year!  Probably because they are so tiny that things tend to fit them for at least two years.  But they've officially outgrown the bathing suit stashes that I have for them - which means it is time for me to get them new bathing suits (like NOW since it's already Memorial Day Weekend)!!!  Girls bathing suits come is such variety!  I always want to buy my girls the sweet, whimsical bathing suits that you can find at Nordstroms or Janie and Jack, but I almost always end up picking bathing suits that have a rash guard shirt.  I know they're not always the cutest - but it means less sunscreen and more protection from the sun!  Here are a few that I'm loving this year:


5. Sundresses
Summertime is the easiest time to dress kids - especially if you have girls!  Mine love wearing a good sundress and will ask to wear one every single day!  I stocked their closet with a ton of new dresses that are casual enough to wear for playing but can also look dressy if we're headed out somewhere!  Here are some options I am loving for girls:
And this sweet paisley print dress that Paisley will be wearing all summer!

Vera Bradley Dress and Bloomers in Tutti Frutti


Today I am linking up with Momfessionals and A Little Bit of Everything

The Fabulous Friday Party on Simple Nature Decor

Tuesday, August 5, 2014

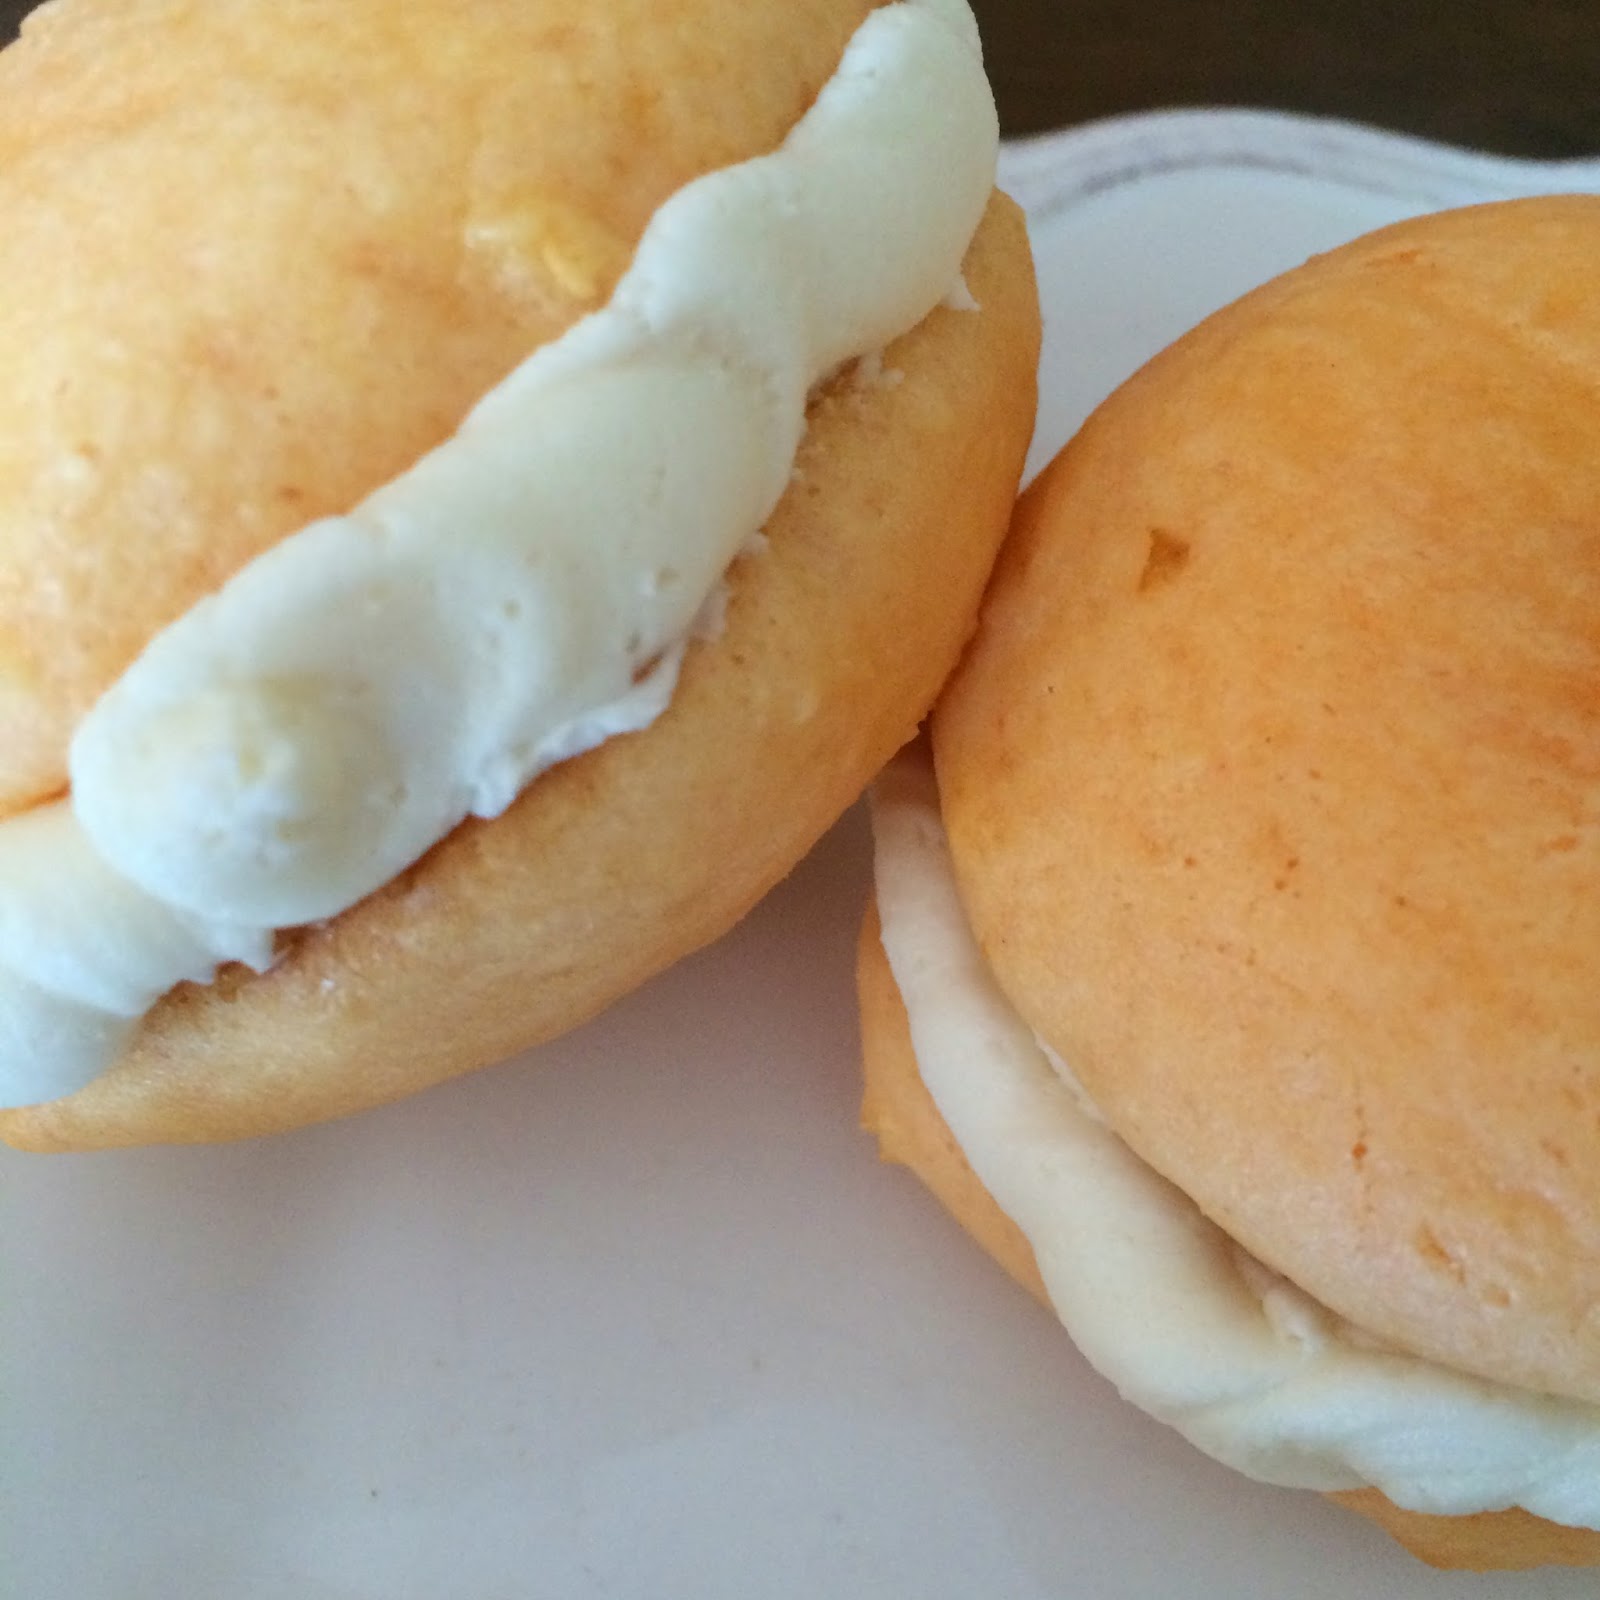
Lemon Whoopie Pies


Last Friday was my birthday!  And since I enjoy baking so much, I did just that and made myself my own birthday treat.  I didn't mind because John did the dishes!  I was so happy with the way my Orange Creamsicle Whoopie Pies turned out that I decided to make:

Lemon Whoopie Pies

And they did not disappoint!  They also are CAKE MIX RECIPE #41!!!

Your Shopping List for the Lemon Whoopie Pies:
  • 1 box lemon cake mix
  • 1/2 cup veggie oil
  • 1/3 cup water
  • 3 eggs
  • buttercream or vanilla icing

Now Let's Make the Lemon Whoopie Pies:
  1. Preheat your oven to 350 degrees and line your baking sheets with parchment paper.
  2. In the bowl of a stand mixer, fitted with the whisk attachment, combine the cake mix, veggie oil, water, and eggs.
  3. Beat on low speed 30 seconds and scrape down the sides.  Beat on medium speed for 2 minutes.
  4. Drop batter by tablespoon or cookie scoop onto prepared baking sheet, leaving room for the cookies to spread.
  5. Take the back of a spoon or a knife to spread batter into flat circles.
  6. Bake in preheated oven for 8-10 minutes (cookies should be soft but cooked through and just starting to get color on the bottom).
  7. Cool for 2 minutes on cookie sheets before transferring to a wire rack to cool completely
  8. Once cookies are completely cool, turn half of the pies upside down and frost the bottom.  For this I used my homemade buttercream icing but if you are short on time you could just use store bought icing to make it easier.  
  9. Place the other half of the pies right side up on top of the frosting.
  10. If desired, use a piping bag to pipe extra icing around the center edge.
  11. Store at room temperature for up to 24 hours, after that wrap each whoopie pie individually with saran wrap and store in the fridge.
Can you tell that Blakely is very eager to eat a Lemon Whoopie Pie?!?  She wouldn't even help blow out the candle! 

Two very happy little girls! 

Saturday, July 19, 2014

Orange Creamsicle Whoopie Pies


Around Easter time I made Orange Creamsicle Cookies, and they were a big hit with my family!  Yesterday for my Dad's birthday, I wanted to use the same flavor idea but make something a bit different...

Whoopie Pies!

They came out DELICIOUS!  And they honestly taste just like a creamsicle!  Plus, they couldn't be easier to make...especially since they are CAKE MIX RECIPE #39!!!!!

This cake mix is perfect for this recipe! 

Your Shopping List for the Orange Creamsicle Whoopie Pies:
  • 1 box orange cake mix
  • 1/2 cup veggie oil
  • 1/3 cup water
  • 3 eggs
  • buttercream or vanilla icing

Now Let's Make the Orange Creamsicle Whoopie Pies:
  1. Preheat your oven to 350 degrees and line your baking sheets with parchment paper.
  2. In the bowl of a stand mixer, fitted with the whisk attachment, combine the cake mix, veggie oil, water, and eggs.
  3. Beat on low speed 30 seconds and scrape down the sides.  Beat on medium speed for 2 minutes.
  4. Drop batter by tablespoon or cookie scoop onto prepared baking sheet, leaving room for the cookies to spread.
  5. Take the back of a spoon or a knife to spread batter into flat circles.
  6. Bake in preheated oven for 8-10 minutes (cookies should be soft but cooked through and just starting to get color on the bottom).
  7. Cool for 2 minutes on cookie sheets before transferring to a wire rack to cool completely 
  8. Once cookies are completely cool, turn half of the pies upside down and frost the bottom.  For this I used my homemade buttercream icing but if you are short on time you could just use store bought icing to make it easier.  
  9. Place the other half of the pies right side up on top of the frosting.
  10. If desired, use a piping bag to pipe extra icing around the center edge.
  11. Store at room temperature for up to 24 hours, after that wrap each whoopie pie individually with saran wrap and store in the fridge.

I found a new love in these little whoopie pies, and I will definitely be mixing up the flavor combos to make a few other cake mix whoopie pies in the near future! 

Happy Summer Baking

Wednesday, July 16, 2014

Blueberry Banana Bread


If you have noticed a lot of blueberry recipes lately, that is because it's blueberry season in New Jersey!  The season doesn't last long, only a little over a month, so we have been trying to enjoy as many blueberries as we can in as many ways as possible!

And I just knew that one of the things I had to make this season was blueberry banana bread!  


Your Shopping List for the Blueberry Banana Bread:

  • 2 cups plus 1 tablespoon of flour, divided 
  • 1/2 tsp cinnamon
  • 2 tsp baking powder
  • 1 tsp baking soda
  • 1/2 tsp salt
  • 1 stick butter, room temperature
  • 1/2 cup white sugar
  • 1/4 cup light brown sugar
  • 2 eggs 
  • 1 tsp vanilla extract
  • 3 overripe bananas
  • 1 generous cup of blueberries plus extra for sprinkling
This is what I mean when I say "a generous cup of blueberries."  See how they are overflowing out of the measuring cup! 

Now Let's Make the Blueberry Banana Bread:
  1. Preheat your oven to 350 degrees and grease 2 loaf pans (mine are 8 1/2 x 4 1/2)
  2. In the bowl of a stand mixer using the whisk attachment, beat together the butter and both types of sugar until light and fluffy
  3. Add in the eggs one at a time, mixing until thoroughly combined
  4. Add the vanilla extract and the bananas and beat until desired consistency is reached (I like some pieces of banana) 
  5. In a medium bowl, whisk together the 2 cups of flour, cinnamon, baking powder, baking soda, and salt
  6. Add dry ingredients to the wet ingredients and mix on the lowest speed until just combined
  7. Toss the cup of blueberries with the remaining 1 tablespoon of flour (this keeps them from sinking to the bottom of the bread) and then gently fold the blueberries into the batter
  8. Divide batter between two loaf pans and sprinkle a few extra blueberries over the tops
  9. Bake in preheated oven for approximately 40 - 45 minutes until a toothpick inserted into the center comes out mostly clean
  10. Cool bread in loaf pans for 10 minutes
  11. Turn out onto wire racks to cool completely 

Friday, July 11, 2014

Roasted Blueberry Banana Puree


My sweet Blakely Hope is the somewhat more picky eater out of my two girls.  This has been a bit challenge since Lacie will eat pretty much anything I put in front of her (with so much enthusiasm that she could book a commercial).  And what is Blakely picky about eating?  Fruit!  Of all things!  Most kids won't eat their vegetables, but Blakely will eat mushrooms and broccoli by the handful.  The pediatrician once said "Oh some kids just don't like sweets."  Yeah, that's not it...because give that girl and cupcake and it will be gone in three bites!

Here is the list of fruit that Blakely will eat:

  • bananas (every single day)
  • oranges - only the little clementine ones
  • strawberries on a good day
Yup that is it.  But you know what she will eat.  Those fruit pouches.  Any flavor.  So that made me think that I should probably just go back to making the homemade baby food that she loved so much as an infant.  Whatever I can make will undoubtedly have more nutrients then those pouches.  

So I went ahead and used the amazing blueberries that we have been picking at a local organic blueberry farm to make something that was one of Lacie and Blakely's absolute favorite flavor combinations...
Roasted Blueberry Banana Puree


Your Shopping List for the Roasted Blueberry Banana Puree:
  • 3 bananas (you can even use ones that are a little overripe) 
  • 1 pint, about 2 cups, of blueberries 

Now Let's Make the Roasted Blueberry Banana Puree:
  1. Preheat your oven to 350 degrees
  2. On a rimmed baking sheet (like a half sheet pan), arrange the bananas *still in their peels* and blueberries
  3. Bake in preheated oven for 20 minutes, until the skins of the banana have turned black and the blueberries are beginning to burst
  4. Allow to cool on pan for 5 minutes
  5. Scoop up the blueberries with a spoon and carefully peel bananas and place into blender or food processor
  6. For older children like mine, pulse or blend quickly, leaving some texture.  For infants, blend until smooth, adding a few tablespoons of filtered water if needed to reach the right consistency
  7. Store in the fridge for up to 48 hours or freeze portions for use at a later date 


This makes 4 servings of approximately 3/4 cup each.  I put each serving into a bowl (as seen above), cover with saran wrap, and store in the fridge.  When my girls were smaller, it made approximately 8 smaller portions that I froze in a freezer tray meant for baby food!  We eat this cold, right out of the fridge.  Younger babies may want it warmed to room temperature!  

Tuesday, July 8, 2014

Blueberry Coffee Cake


This blueberry cake is a recipe that I have made a number of times over the past five years.  I have adjusted some ingredients here and there until I got it absolutely perfect!  It comes out best using fresh blueberries, but I have used frozen blueberries in a pinch with good results! 


Your Shopping List for the Blueberry Coffee Cake:
  • 2 cups flour
  • 3/4 cup sugar
  • 2 1/2 tsp baking powder
  • 1 tsp salt
  • 1/4 cup butter, melted and cooled
  • 3/4 cup milk 
  • 1 egg, lightly beaten
  • 2 cups blueberries
Your Shopping List for the Crumb Topping:
  • 1 cup sugar
  • 2/3 cups flour
  • 1 tsp cinnamon
  • 1 stick cold butter, cubed
Your Shopping List for the Vanilla Glaze:
  • 3/4 cup powdered sugar
  • 1/2 tsp vanilla extract
  • about 4 tsp milk or water

Now Let's Make the Blueberry Coffee Cake:
  1. Preheat oven to 375 degrees and liberally grease a 9 inch springform pan with cooking spray and set aside
  2. In a large mixing bowl whisk together the flour, sugar, baking powder and salt called for in the Blueberry Coffee Cake shopping list
  3. Add the melted butter, milk, and egg and mix with a wooden spoon until just combined (this batter will be very thick)
  4. Gently fold in the blueberries 
  5. Spread coffee cake mixture evenly into prepared pan
  6. In a small mixing bowl whisk together the sugar, flour, and cinnamon called for in the Crumb Topping shopping list
  7. Cut in cold, cubed butter with a pastry cutter
  8. Sprinkle crumb topping over coffee cake batter
  9. Bake in preheated oven for 45 minutes until the cake is cooked through and the top is golden
  10. Remove from oven and place pan on a wire rack to cool for 10 minutes.  Remove sides of pan and allow cake to continue cooling
  11. Meanwhile in a small mixing bowl, combine the powdered sugar, vanilla extract, and water or milk until a glaze forms that is thin enough to drizzle but thick enough to not fully spread out when poured 
  12. While cake is still warm, drizzle with Vanilla Glaze
  13. Cut and serve coffee cake while warm or allow to finish cooling completely and store in a cake carrier or on a cake plate with lid  


Tuesday, July 1, 2014

Fourth of July Funfetti Bars


The very first Cake Mix recipe that I shared on this blog was Lacie's Lazy Funfetti Cookie Bars!  I call them that because they are so easy to make!  Seriously you can make these in a total time crunch and use really any cake mix you have on hand!  But the funfetti ones are the best, and funfetti cake mix just happens to always come out with holiday editions so that you can whip up a batch of these cookie bars to fit the current season!

Here's what you need to make a perfect and festive treat for Friday!  At my grocery store *WEGMANS* this can be found in their seasonal aisle.  But some stores may carry it in the regular baking aisle! 

Your Shopping List for the Fourth of July Funfetti Bars:
  • 1 box of stars and stripes funfetti cake mix (pictured above)
  • 1 stick of butter, melted
  • 2 eggs, lightly beaten 
  • 1 bag of white chocolate chips 

Now Let's Make the Fourth of July Funfetti Bars:
  1. Preheat your oven to 350 degrees and grease a 9x13 baking dish
  2. In a large mixing bowl, combine the cake mix, melted butter and beaten eggs until a dough forms
  3. Stir in the white chocolate chips
  4. Press into prepared baking pan
  5. Bake in preheated oven for 20 minutes
  6. Remove from oven and use the back of a spatula to press down the surface of the cookie bars, making them completely flat
  7. Return to oven for 5 additional minutes
  8. Remove from oven and press down with spatula again if needed to re-flatten your bars
  9. Place baking dish on wire rack and allow to cool completely before cutting into 24 squares and storing in an airtight container


Tuesday, June 24, 2014

Lemon Blueberry Muffins


Last Friday, I took my *almost three year old* Lacie Jane out for some Mommy and Me time!  We do almost everything as a family, either with John on the weekend or just the three girls during the week.  We hardly ever split up.  But every once in awhile, I think it's nice to have some special one on one time!  It's finally blueberry picking season in New Jersey, and you do not know what you are missing if you have never had New Jersey blueberries!  They are the BEST!  We always go to a local organic blueberry farm!

Here's my sweet girl picking (and eating) blueberries! 

And just for fun, this is what Lacie looked like last summer on her very first trip to the blueberry farm!  She was just the cutest little thing!

Now since we spent all that time and energy picking delicious, organic blueberries, I knew that I wanted to make muffins that would be relatively healthy!  I used all organic ingredients for these muffins, but you can certainly use whatever baking supplies you keep on hand! 

Your Shopping List for the Lemon Blueberry Muffins:
  • zest and juice from 1 lemon
  • 1/3 cup sugar 
  • 2 cups whole wheat flour
  • 2 1/2 tsp baking powder 
  • 1/4 tsp baking soda
  • 1/2 tsp salt
  • 1 cup milk 
  • 1/2 cup coconut oil, melted and cooled 
  • 2 eggs
  • 3 tbsp honey
  • 1 heaping cup of fresh blueberries
  • raw sugar for sprinkling (optional) 
Now Let's Make the Lemon Blueberry Muffins:
  1. Preheat your oven to 400 degrees and use paper liners or spray (I used a coconut oil spray) a 12 - 14 cup muffin pan.
  2. In a large mixing bowl, combine the lemon zest and sugar.  Rub or whisk together until this mixture becomes very fragrant.
  3. Add the flour, baking powder, baking soda, and salt to the bowl and whisk together until thoroughly incorporated.
  4. In a large glass measuring cup, squeeze the juice from the lemon.  Add in the milk until it reaches the 1 cup line marker.  
  5. Add the coconut oil, eggs, and honey.  Whisk the wet mixture together until thoroughly incorporated. 
  6. Pour the wet ingredients into the dry ingredients and mix with a wooden spoon until just combined.
  7. Gently fold in the blueberries.
  8. Divide batter evenly into prepared muffin cups.  If desired, sprinkle a pinch of raw sugar over the tops of the muffins.  
  9. Bake in preheated oven for 20 - 23 minutes.
  10. Cool muffins in pans for 10 minutes.  Transfer muffins to wire racks to cool completely before storing in an airtight container.  


Wednesday, May 14, 2014

Lemon Poppy Seed Muffins


I Am In Love...with my hubby, my two girls, and LEMON!  I have been whipping up plenty of lemon treats around the Hilosky House.  You can click here and here and here for some other lemon recipes!  I have been slacking on making muffins over the past two weeks, and I just happened to have a few a ton of lemons sitting in the fridge!  So it just made sense for me to make Lemon Poppy Seed Muffins!


Your Shopping List:

  • 1 stick butter, softened to room temperature
  • 1 cup sugar
  • 2 eggs
  • 1/2 cup plain greek yogurt
  • 1/2 cup milk
  • 2 tbsp lemon juice, freshly squeezed
  • 1/2 tsp lemon extract
  • zest of one lemon
  • 2 cups flour
  • 1 tsp baking powder
  • 1/2 tsp salt 
  • 1/4 tsp baking soda
  • 2 tsp poppy seeds 

Now Let's Make the Lemon Poppy Seed Muffins
  1. Preheat your oven to 350 degrees and line a 12 cup muffin tin with paper liners
  2. In a stand mixer fitted with the whisk attachment, cream together the butter and sugar until light and fluffy
  3. Beat in eggs one at a time
  4. Add the greek yogurt, milk, lemon juice, and lemon extract and mix until batter is smooth
  5. Stir in the lemon zest
  6. In a separate bowl, whisk together the flour, baking powder, salt, and baking soda
  7. With the mixer on the lowest speed, add the dry ingredients to the wet and mix until just combined
  8. Stir in the poppy seeds
  9. Divide batter evenly between the muffin cups
  10. Bake for 20 - 23 minutes
  11. Cool in pan for 10 minutes before transferring to a wire rack to cool completely

Optional Glaze
  • In a small bowl, stir together 2/3 cup powdered sugar with 4-5 tsp freshly squeezed lemon juice
  • Drizzle over tops of completely cooled muffins or dip muffin top into glaze completely
  • Allow glaze to harden before storing in an air tight container

Saturday, May 3, 2014

Lemon Oatmeal and Blueberry Jam Bars


I may be just a tad obsessed with all things lemon!  I have been buying lemons by the bag at Wegmans and using them in everything from baking to my drinking water.  Even little Lacie Jane is requesting lemon slices in her ice water...and drinking lemon and honey tea!  Her two year old palate is very sophisticated!  So last week when I was thinking about what I wanted to bake, I knew I wanted it to have LEMON!  I thought about some of the things I have already made, and decided to mix up my original recipe for Oatmeal and Jam Bars to make them lemon bars!  And what goes better with lemon than blueberry!  

These delicious bars come together with just 4 ingredients!!!  They also mark Cake Mix Recipe #36!!!


Your Shopping List:
  • 1 box lemon cake mix
  • 2 1/4 cups oats (I used old fashioned because I wanted these bars super chewy)
  • 2 sticks butter, melted
  • 1 cup blueberry jam

Now Let's Make the Lemon Oatmeal and Blueberry Jam Bars:
  1. Preheat your oven to 375 degrees and grease a 9x13 baking dish
  2. In a large mixing bowl, whisk together the cake mix and the oats
  3. Add the melted butter and stir until a dough forms
  4. Divide the dough into thirds
  5. Press two thirds of the dough into the bottom of your prepared baking dish
  6. Spread blueberry jam on top of the dough - spread it almost to the edge 
  7. Crumble the remaining one third of the dough on top of the jam layer 
  8. Bake in preheated oven for about 25 minutes until the top is nice and golden
  9. Allow pan to cool on a wire rack completely, cut into squares, and store in an airtight container
If you can't find blueberry jam (or if you just don't like it) you could definitely make this with strawberry or raspberry jam!  

And since this has oats in it, you can totally eat it for breakfast!  


LinkWithin

Related Posts Plugin for WordPress, Blogger...