Monday, April 7, 2014

Lemon Neiman Marcus Bars


I love a good Neiman Marcus Bar!  They are one of my favorite desserts thanks to the combination of a chewy brownie-like crust and an awesome cream cheese topping that never fully sets...meaning it stays gooey!!!  And apparently, my awesome readers like Neiman Marcus Bars too because my recipes for Red Velvet Neiman Marcus Bars and  Butterscotch Neiman Marcus Bars are two of my most viewed posts!!!

This is the face of someone who loves a good Neiman Marcus Bar!

If you haven't tried making a Neiman Marcus Bar yet, you definitely want to try out this Lemon Neiman Marcus Bar!  It is delicious!  And it is the perfect flavor for an Easter or Spring party!  It is also Cake Mix Recipe #32!!!!


Here's What You Need to Make the Lemon Neiman Marcus Bars:
  • 1 box Lemon Cake Mix
  • 3 eggs
  • 1 stick butter, melted
  • 1 cup white chocolate chips
  • 1 block cream cheese, room temperature
  • 1 tsp lemon zest
  • 1 tsp freshly squeezed lemon juice
  • 4 cups powdered sugar 

Now Let's Make the Lemon Neiman Marcus Bars:

  1. Preheat your oven to 325 degrees and grease a 9x13 pan with butter or nonstick spray
  2. In a large bowl, combine lemon cake mix, one egg, and melted butter until a soft dough forms
  3. Press dough into bottom of prepared pan
  4. Sprinkle white chocolate chips over top of dough and press down lightly
  5. In the stand of a mixer fitted with the whisk attachment beat together the cream cheese, remaining two eggs, lemon zest, lemon juice, and powdered sugar until combined and smooth
  6. Spread mixture on top of the dough and white chocolate chip layer (it will completely cover the bottom)
  7. Bake in preheated oven for approximately 40 minutes until the edges are crisp and the top of the cream cheese mixture has a slight crust but doesn't seem completely set (the center will still wobble a bit) - The picture below is what you are looking for 
  8. Allow pan to cool on a wire rack for thirty minutes
  9. Transfer pan to fridge to cool completely (at least two hours)
  10. Cut into bars and serve or store in the fridge until you are ready to eat


Friday, April 4, 2014

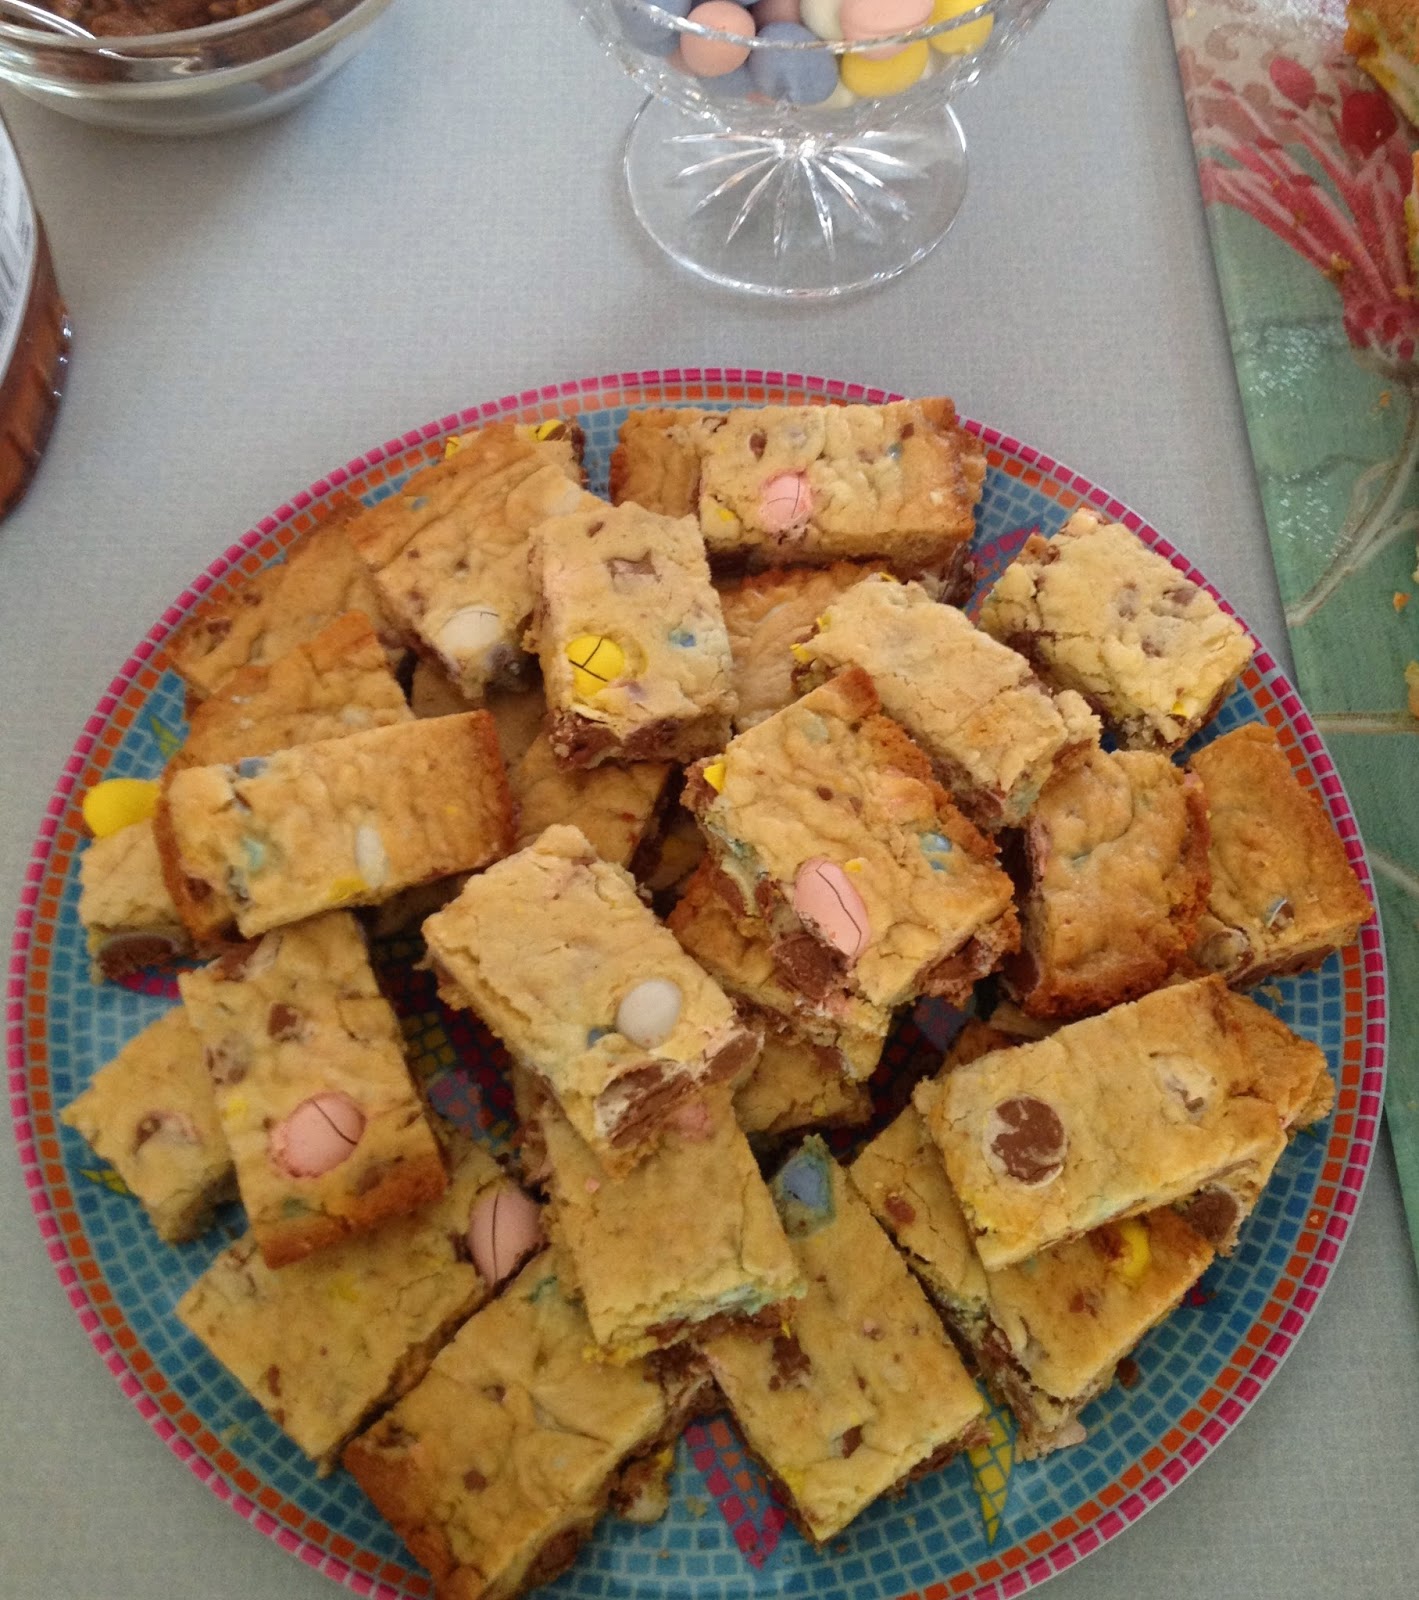
Cadbury Easter Cookie Bars


Are you tired of hearing about how much I love Cadbury Mini Eggs yet?!?  They are hands down my favorite candy!  Those Cadbury Mini Eggs are out in every single store right now, and they are beautifully colored this time of year!  Perfect for Easter or Spring baking!


What You Need to Make the Cadbury Easter Cookie Bars:
  • 1 box vanilla cake mix (yellow or white would work just fine too)
  • 1 stick butter, melted
  • 2 eggs, lightly beaten
  • 2 bags of Cadbury Mini Eggs (the spring color variety - PINK, yellow, blue, and white) 

Now Let's Make the Cadbury Easter Cookie Bars:
  1. Preheat your oven to 350 degrees and liberally grease a 9x13 pan with butter or cooking spray
  2. Open your Cadbury eggs and pour the entire first bag and half of the second bag into a large ziploc bag (save the remaining half of the eggs - don't start eating them - you will use them too)
  3. Seal the bag and use a rolling pin to lightly crush the Cadbury Eggs (you don't want them to be ground into find powder - you still want there to be big chunks in your batter).  Set bag aside
  4. In a large mixing bowl stir together the cake mix, melted butter, and both eggs
  5. Fold in the crushed Cadbury Eggs
  6. Spread into prepared 9x13 pan
  7. Take remaining whole Cadbury Eggs and sprinkle on top
  8. Bake in your preheated oven for 20 minutes
  9. Remove from oven and lightly push down over the entire surface with the back of a spatula - essentially making it flat 
  10. Return to oven for five minutes
  11. Remove from oven and push down with spatula again if needed 
  12. Cool in pan completely
  13. Cut into 24 squares and ENJOY!

Looking for more Cadbury Egg Love?!?  You can find other recipes HERE and HERE!

Thursday, April 3, 2014

#hiloskyeveryday2014 Week 14

 Day 87 - The Perfect Afternoon Snack!  Click here for the Easter Egg Thumbprint Cookie recipe


Day 88 - Princess Lacie wanted Yellow Nails!  I actually had to buy yellow nail polish because it is the one color I did not have!  It amazes me that she will sit still long enough to get her nails and toes done! 


Day 89 - Clean Sheet Sunday!  Every single Sunday I wash everyone's sheets and blankets!  Going to sleep on clean sheets is one of life's little pleasures!  It makes facing Monday Morning a bit better.  


Day 90 - I have the best husband who is always home to help me with the girls!  But even he deserves some guy time!  His friends go through me because they know that he will never commit otherwise! 


Day 91 - Opening Day! In the Hilosky House, you are born a Yankee Fan! 


Day 92 - 8:15 am and this sweet girl was still out cold.  Oh did she stay up late you might ask...nope she just loves to sleep!  Most nights (including the night before this picture) she is sound asleep by 7pm.


Day 93 - It is so special that my dad comes over to visit and have breakfast every morning!  Today, the girls piled up on Pop-Pop!!!!  There was lots of laughing as I was in the kitchen cooking! 

Tuesday, April 1, 2014

Yankees


In the Hilosky House, we are all Yankee Fans!  In fact, we often live by the motto that in a perfect world, everyone would be a Yankee Fan!  Today marks the opening day of the Yankees 2014 season, and Derek Jeter's last season.  Derek Jeter is the player that John and I will talk to our children about the way my dad always talked about Mickey Mantle.  In fact, Derek Jeter is the player that made my sixth grade self actually start paying attention to all those baseball games my dad watched.  John was even lucky enough to be at the game when Derek Jeter got his 3,000th hit!

So today I felt that I needed to do a little Hilosky Family Yankees Baseball Tribute! 

In 2009, when John and I were getting married, he ordered t-shirts for everyone with a Yankees NY and our names and wedding date!  We still have the shirts!  Luckily, we als have a few small cousins who have passed down their shirts to our girls!
Lacie and Blakely in 2013 wearing the John & Lindsay shirts!  

Lacie and Blakely rocking the shirts again today for opening day! 

John wore that same shirt for the birth of both Lacie and Blakely.  I have no doubt that if we are blessed with any more children, John will again wear that exact Yankees Shirt!  

To celebrate our first wedding anniversary, John and I went to a Yankees Game!  The gift for one year is paper - so we did tickets! It was so cold that day that I had to buy the long sleeve shirt I am wearing about halfway through the game!  

Lacie Jane rocking her first Yankees Tee at only a few weeks old! 

Sweet B in the same shirt at 4 months old! 

Lacie wearing her first pink yankees hat....when she actually kept hats on her head!

A rare picture of me in a hat!  This was last summer, right after July 4th!  

Lots of Yankees Baseball Love in our house! 


Monday, March 31, 2014

Chocolate Buttercream Icing


I really just love love love homemade icing!  In fact, if I had known how simple it was to make delicious homemade icing years ago, I would have never ever bought icing in a can from the food store.  NEVER!  I can promise that once you master a few recipes for homemade icing, you will never go back to that store bought kind either!  If you are looking for a basic and super simple icing recipe, you can find my Buttercream Icing Here


Now back to the chocolate!  I love all things chocolate and icing is no different!  This chocolate buttercream icing will go perfectly on any cake that you make - I used it to frost a yellow cake! 

Here's What You Need to Make the Chocolate Buttercream Icing:
  • 2 sticks of butter, softened to room temperature
  • 1 tsp vanilla extract
  • 3/4 cup unsweetened cocoa powder
  • 1 pound (about 4 cups) powdered sugar
  • 3-4 tbsp half and half (cream or milk will also work)

Now Let's Make the Chocolate Buttercream Icing:
  1. In the bowl of a stand mixer fitted with the whisk attachment, beat together the two sticks of butter and the vanilla extract
  2. Beat in the cocoa powder 1/4 cup at a time until fully incorporated 
  3. Add the powdered sugar 1 cup at a time on low speed - the mixture will be thick and crumbly
  4. Add the half and half one tablespoon at a time, increasing the speed of your mixture, until the icing comes together
  5. Whip on high speed until desired texture is reached (I did about 4 minutes - as you continue to mix the icing it will get fluffier and take on a more "whipped" consistency)
  6. Immediately ice your cake (or cupcakes)

PERFECT! 
This recipe makes enough icing to generously frost and fill a 9 inch cake like this one! 


KitchenAid Pink Artisan Stand Mixer KitchenAid Pink Artisan Stand Mixer

Friday, March 28, 2014

Easter Egg Thumbprint Cookies


Happy Happy Happy Friday!  I look forward to Friday all week!  I always blog about dessert on Friday because I think it makes this day of the week even sweeter!

Before I get into this week's dessert, I wanted to let everyone know that I am being featured on my friend Christina's blog!  She is doing a Feature Friday once a month where she highlights a fellow blogger, and today she picked me!  I was super honored.  Click here to check it out!

Now onto the dessert!  I have definitely blogged about my love of the Cadbury Mini Eggs in the past!
These are like little scrumptious pieces of Heaven!  They are hands down my favorite Easter Candy!  So rather than watching TV and eating an entire bag of these pastel colored delights (something me and the hubby have done a time or two) I try to bake some yummy things using this candy instead! 


Here's What You Need to Make the Easter Egg Thumbprint Cookies:

  • 2 sticks of butter, softened
  • 1 tsp vanilla extract
  • 3/4 cup powdered sugar 
  • 2 cups of flour
  • 1 cup semisweet chocolate chips
  • 1 tbsp butter
  • 24 - 30 Cadbury Mini Eggs (depending on how many cookies you make)


Now Let's Make the Easter Egg Thumbprint Cookies:
  1. Preheat your oven to 350 degrees
  2. In a stand mixer fitted with the paddle attachment, cream together the butter and vanilla extract
  3. Beat in the powdered sugar until smooth
  4. Mix in the flour, 1 cup at a time, until a soft dough is formed
  5. Roll dough into 1 inch balls and place onto ungreased cookie sheets
  6. Use a thumb or the back of the spoon to make indentation in the center of each ball
  7. Bake for 11-14 minutes until just lightly golden
  8. Cool for two minutes on pan before transferring to wire rack to cool completely - you may need to press down lightly on the thumbprints to make them deeper if they puffed up during cooking (which may happen since there is nothing in the holes to weigh them down)
  9. In a microwave safe bowl, place 1 cup chocolate chips with 1 tbsp butter and heat for 1 minute - more or less depending on your microwave
  10. Remove and stir until mixture is smooth
  11. Allow chocolate to cool for 1-2 minutes and spoon into center of each cookies or place into a piping bag and pipe into holes - this is what I did and it will be much less messy! 
  12. Press 1 Cadbury Mini Egg onto the top of the chocolate 
  13. Allow chocolate to harden before storing the cookies in an airtight container 

Looking for more Cadbury Mini Egg Recipes?!?  You can find one here and another one here

They are perfect with a cup of coffee! 

HAPPY BAKING! 

Thursday, March 27, 2014

#hiloskyeveryday2014 Week 13

Day 80 - This picture sums up their personalities perfectly...Lacie strolling along the path while Blakely is practically falling over pushing past Lacie so that she can run!  We are really looking forward to nicer weather! 


Day 81 - My artist!  According to Lacie, it is a picture of a big fat caterpillar!  We have been reading "The Very Hungry Caterpillar" at least once every single day! 


Day 82 - Celebrating Uncle Matt's 30th birthday with a Sunday Brunch!  It's not everyday that Lacie gets to eat a piece of cake the size of her head for breakfast! 


Day 83 - Nope we aren't going outside, Blakely simply needed a helmet.  We call her bumpy!


Day 84 - post 2 1/2 hour nap and they are still sleepy! 


Day 85 - Lacie was still sound asleep at 2:30 so I told Blakely to wake her up!  She got into Lacie's crib and just put her head down on Lacie's back and stayed there!  It was such a sweet moment.  And no Lacie didn't wake up - we had to shake her awake!  That child can sleep through anything! 


Day 86 - A pretty sad day for John's truck!  He's had it longer than we've been together so we knew it was coming.  I think the Hilosky Family may be in the market for a minivan...

LinkWithin

Related Posts Plugin for WordPress, Blogger...